Mail merge printing letters
Imagine you have a large contact list, and you have been given the task of sending all your contacts an invoice, the traditional way of changing the name and address details for each contact would be very time-consuming. The following guide will show you how to create a mail merge.
Your contact list needs to have headers for each field you want to use in your letter, First Name, Last Name, Telephone, Email etc

You should save your contact file in .csv format – we will use this to import the contact details into our Word document.
After you create your contact list, open MS Word and create your letter.
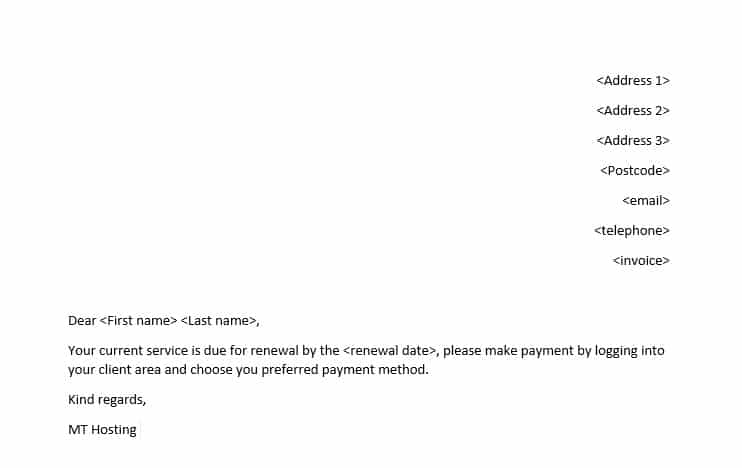
I have added chevrons to indicate the fields that will get merged from our contact.csv file, select the mailing's menu in MS Word.

Click the Select Recipients menu.

Use an existing list and select the contact.csv file we created previously – make sure the contact.csv file is not open, or you will get a warning message.
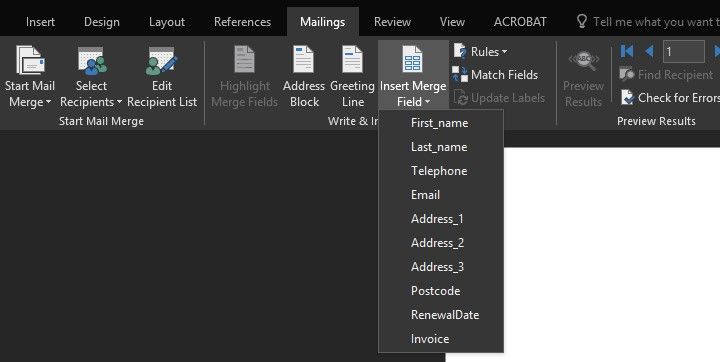
A new menu is now visible, this shows all the headings from the .csv file we linked too previously.
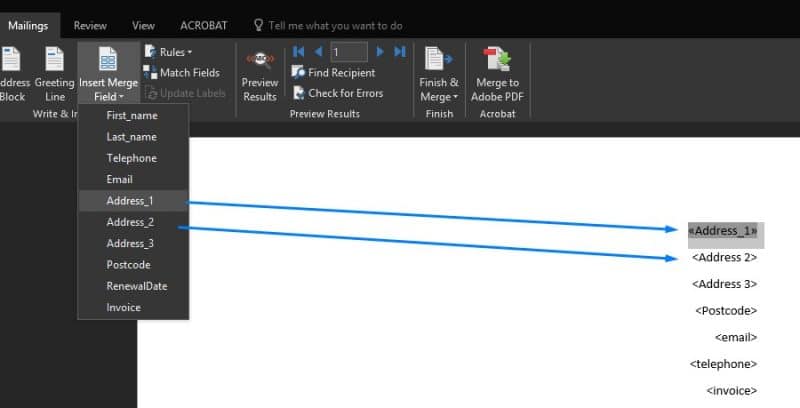
When a field is replaced in the letter it will have a double arrow either side «Address_1» go through the letter replacing each field with the correct merge field from the list, you might need to make some adjustments, so the fields are in the correct location, remove any extra spaces and make sure all the fields are in the correct place.
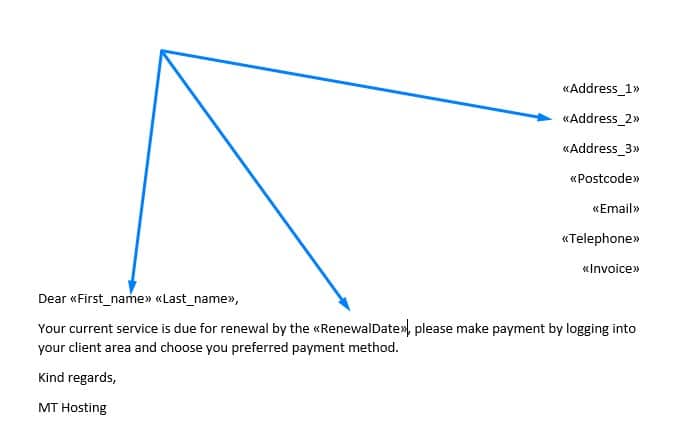
Your letter should look similar to the picture above, with all field names replaced by the merge headers.
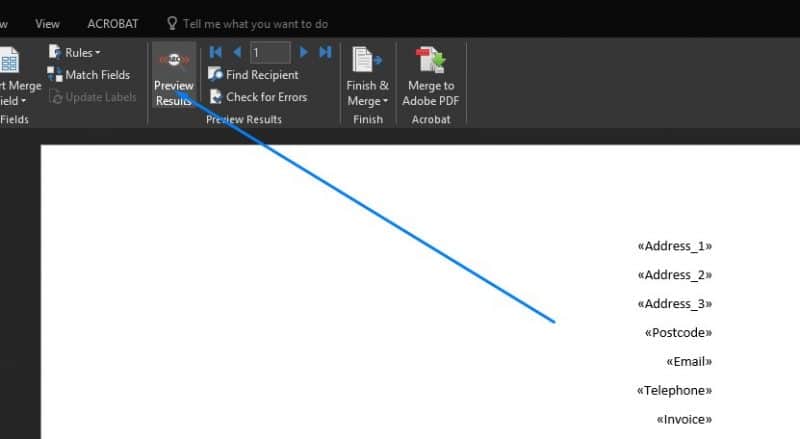
Select the preview button to check the mail merge is working.
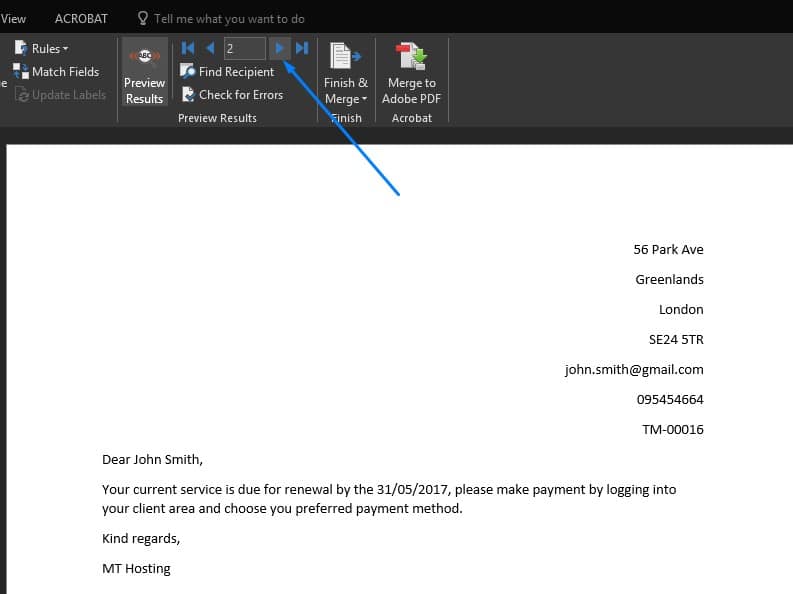
Use the next arrow to scroll through all the records in your contact list, make any adjustments to the mail fields in your MS Word document, so they are in the correct location.
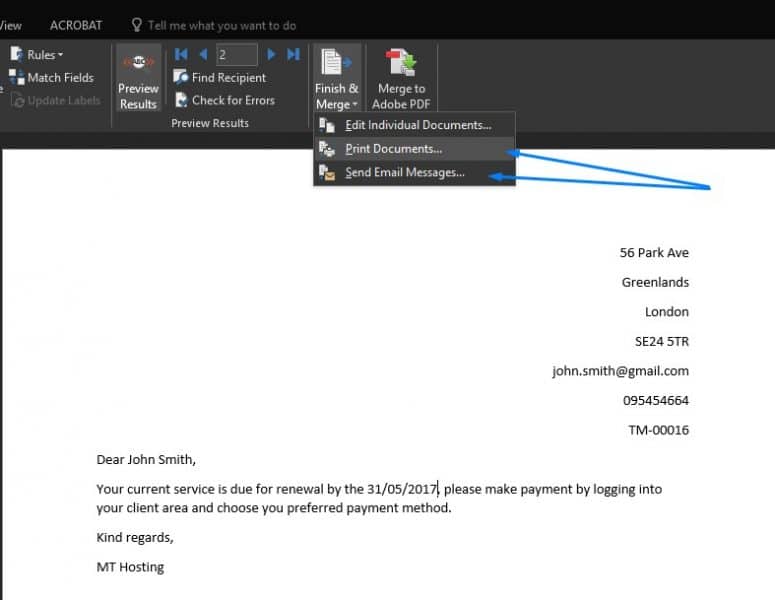
When you are ready to merge, you can either print or email the letter.
This short video goes through each step.
More tutorials
Please check out my other video tutorials in the Virtual Box series:
Install Windows 10 on Virtual Box


