


With the latest news about the Blockchain, Bitcoin, Ethereum, cryptocurrencies, and ICO popping up left, right and centre, this Blockchain business is garnering quite a lot of attention. So I’ve put together a tutorial so that you can understand the technology much better, and you can become a part of the booming crypto-economy!
In this tutorial, my objective is to walk you through the steps of setting up your account through to issuing your first token on the Ethereum network using a single smart contract and MyEtherWallet.
The token will be a standard ERC20, it will have the main functions and can be used as a general base for more sophisticated applications than just transferring them (many “half-serious” ICO's have extremely similar contracts)
Before we start:
There are a few different components you will need in order to build your own token.
- Ethereum Address (Ropsten Network)
- Some Ethereum (Ropsten Network)
- A text editor (I.e. Sublime / Atom)
- Solidity contract
Ethereum address
- For this tutorial, we will use a test network to issue the token, so you don’t end up spending real Ether’s. We will use the Ropsten Test network. In order to get started, go to MyEtherWallet (MEW) and create an account there.
- To get setup, click the right-hand side corner, change the network to Ropsten (MyEtherWallet) → click the New Wallet →Enter a password you can remember → Download / Save your Keystore file in a safe space → Save your Private Key in a safe space.
- To view your wallet address, go to →View Wallet Info →Private Key → Enter the saved private key →Unlock your Wallet, and it should be there!
Text Editor
Download one of the following text editors:
Contract
- Download the smart contract, by clicking here. ⬅️
- You will be editing this code for your own token
Ropsten Ethers
Request Ropsten Ethereum! Just access https://faucet.metamask.io/
and put your ropsten address and our smart contract will send you some!
Transfer only once, please! And if it doesn’t work, let me know in the comments!
What you will have to do, in simple terms:
- Download MetaMask at metamask.io.
- Select Ropsten Network.
- Select DEPOSIT.
- Claim 1 Ropsten ETH.
- Transact to the address you will use for the tutorial on MyCrypto.
IMPORTANT!
Let’s get started:
- Open the contract you downloaded in your Text Editor.
- Go to Line 3–15 and look at the comment section. Although this is a comment section, this will help you down the track. For me,
techiemike was my first one :). - Change Line 4 to the title of your Smart Contract
- Change Line 6 to the Ropsten Ethereum address you created in MyEtherWallet
- Change Line 7’s Symbol to your respective coin name (Keep it short)
- Change Line 8 to the name of your token
Next:
- Go to Line 102 and change “TechieMikeToken” to “(YourTokenName)
- Do the same for Line 115
- Go to Line 116 and change the symbol name, the same as the ones you did in the comment section
- Do the same for Line 117
- Change Line 120’s Address to be the same as the one you generated in MEW
- Same goes for Line 121
For the decimals and total supply on Line 118 and 119, you can just leave it as it is, however I’ll explain it just for visibility. On total supply, there are actually a few considerations. The first one is that the standard (and max) is 18 decimals, meaning that a coin can be split into 18 parts.
The second one is that let’s say for example you want to issue 100 tokens, on the total supply part you have to put 100 followed by the number of decimals that you choose.
Ex: If I want to emit 100 tokens, what I will put on total supply is: 100000000000000000000; etc.
Now we are going to do some cool stuff…
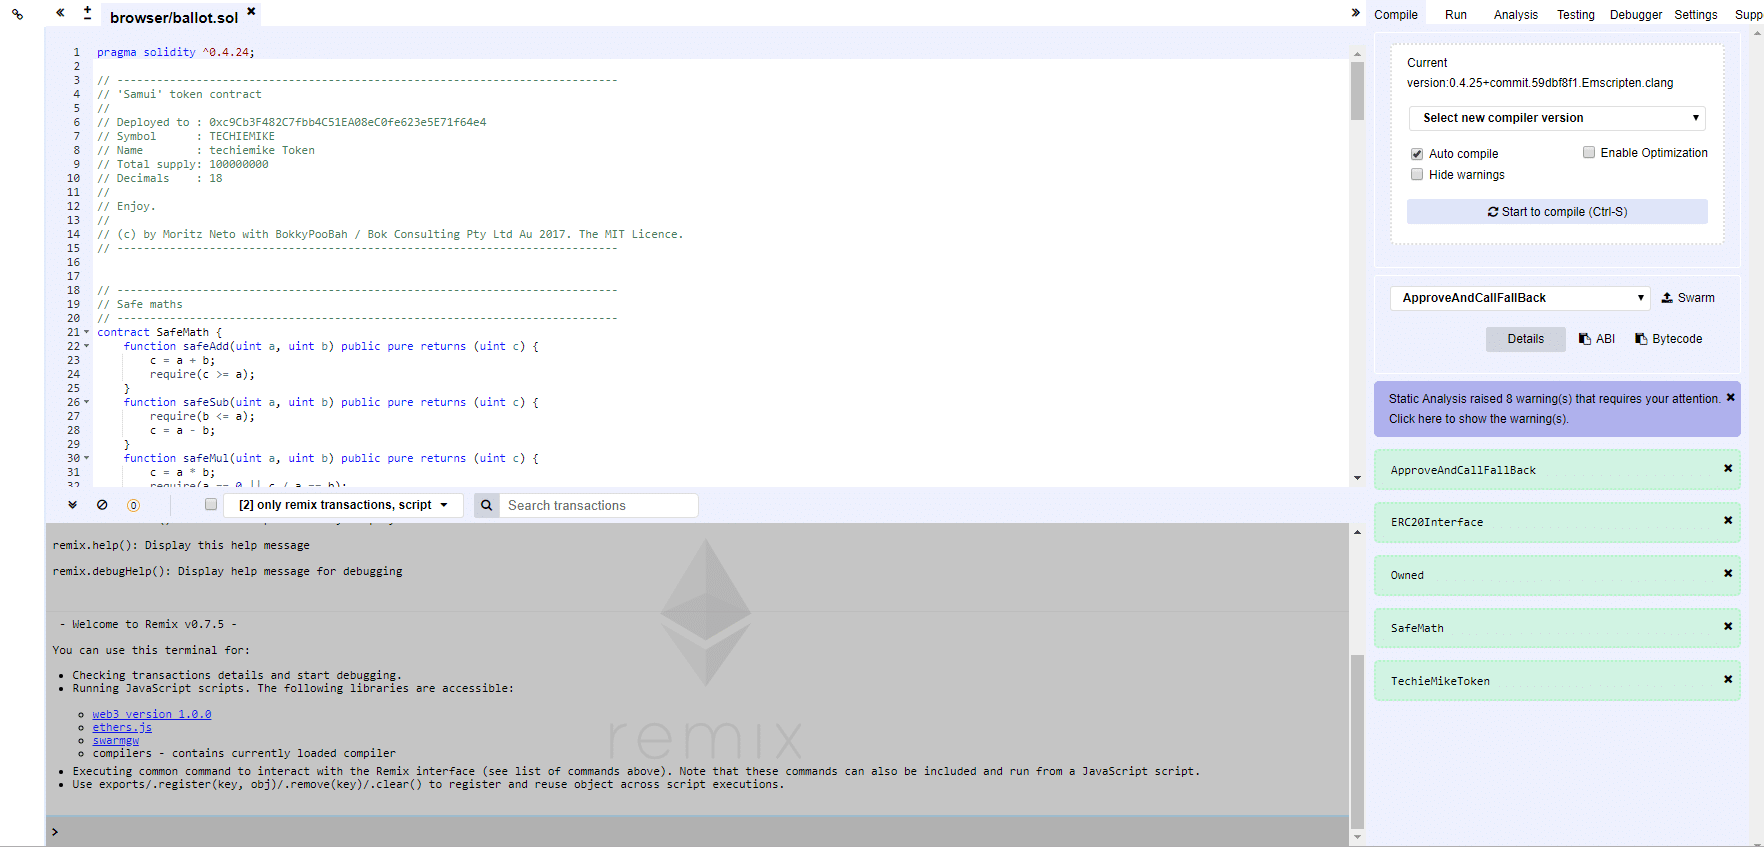
- Go to http://remix.ethereum.org/
- In the browser/ballot.sol, paste the code you just edited! If something red comes up, there is something wrong in the code. If there is a yellow warning, it’s alright, let’s hope for the best.
- Now Under Compile →Details →Choose the Token you are creating
- Under ByteCode press the 📋button to copy the ByteCode to your clipboard —(Into this section, what may appear are different things on the ByteCode. What you have to copy is the “object” ByteCode, adding a 0x in the beginning. So you will have 0xByteCode.)
- Go to MEW where we will start to deploy the contract. Remember we want to be on the Ropsten Test Network so make sure the top right-hand corner says
- Navigate to the Contracts tab → Press Deploy Contract
- Paste your ByteCode into the ByteCode box. Your gas limit should automatically update
- Access your wallet by going into the Private Key → Enter your private key →Unlock your wallet
- Now press Sign Transaction →Deploy Transaction
ATTENTION: This is the moment where you have to cross your fingers for the first time during a few seconds. 🤞
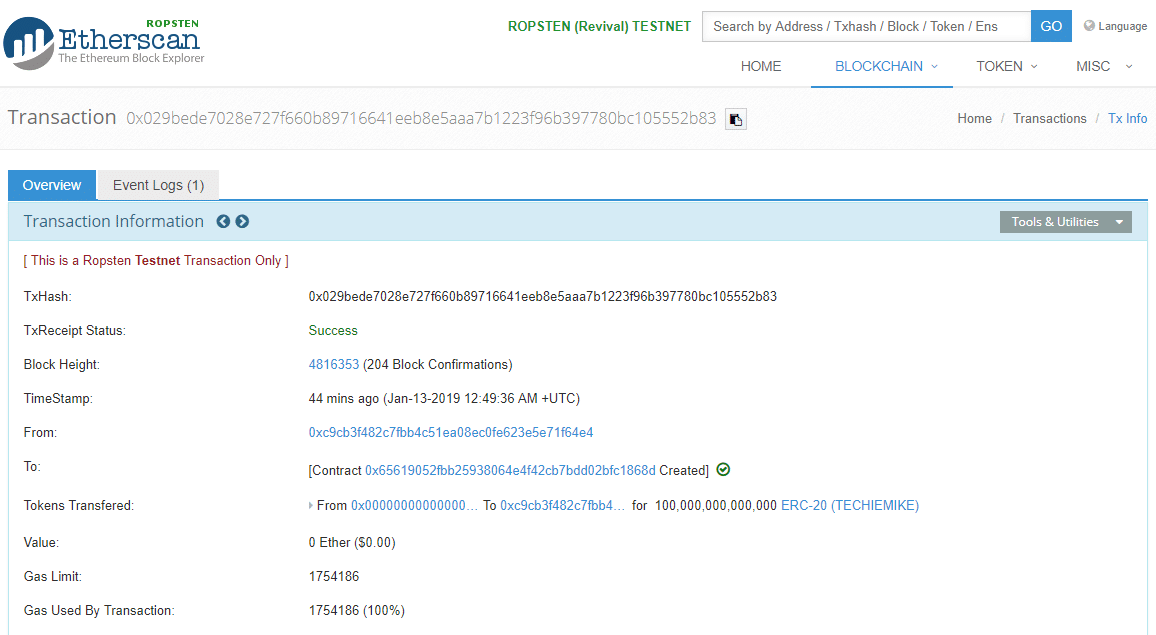
Click on the transaction tx or access https://ropsten.etherscan.io to check if the contract went through. If it didn’t, start again and try to figure it out, what you got wrong. If it did, you are a basically Vitalik 2.0, be proud.😎
If everything works out, this is a sample image of what you should be seeing.
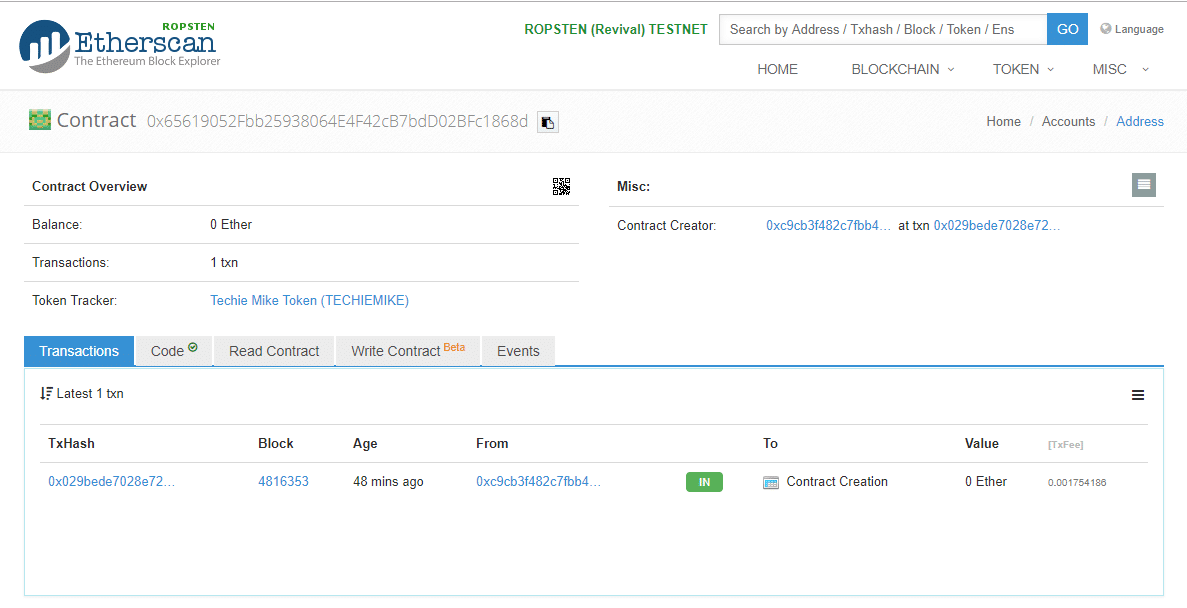
Now we are going to register this contract. To do that:
- In the Overview Tab → Click on the Contract Address
- Go to the Contract Code Tab → Click Verify and Publish
Nearly there… The following steps are really important. So look carefully. Basically what we are doing here is trying to guarantee that the code fits what you saying you are deploying and registering this on the network. FOREVER.
So if you commit mistakes, it will be wrong forever. What a friend told me that on the Blockchain:
Get it right once or get it wrong forever.
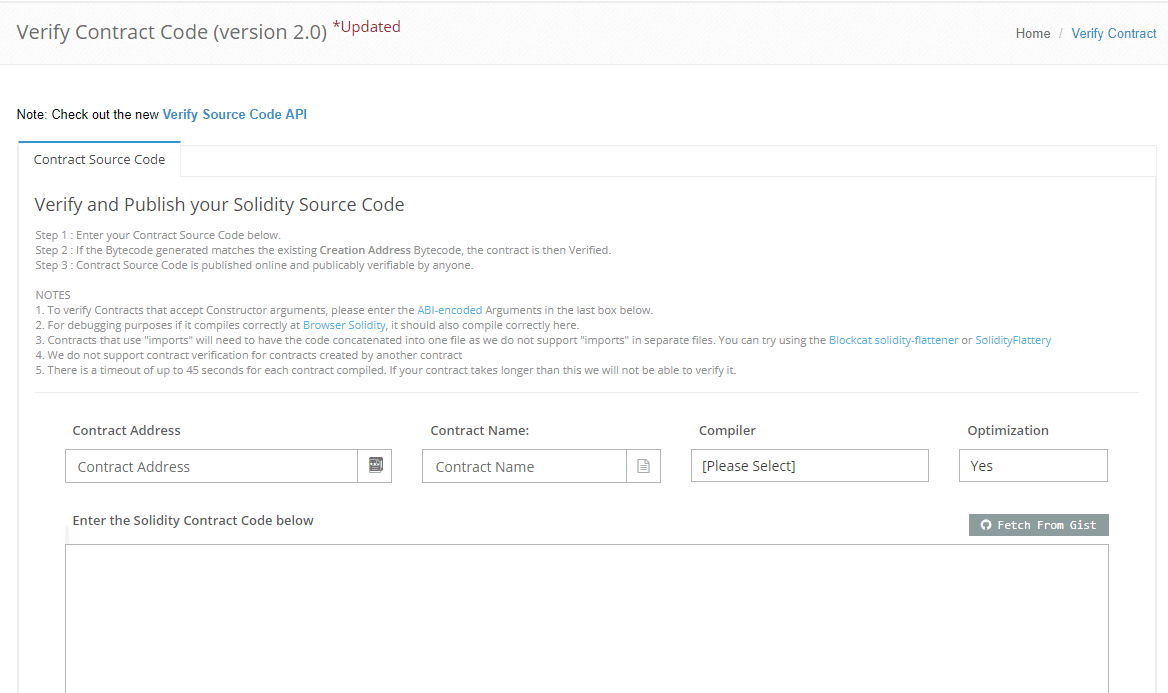
Now you have 5 things to do on this page.
- Be sure that the contract address field corresponds to the contract address that you have just deployed. Remember contract address is different to the MEW address you created so make sure not to get them confused
- The contract name has to match the one in the code, in my case is this: contract TechieMikeToken. This was on Line 102 in your code
- To check which version of the complier, go back to the remix page where you got the BYTECODE from and look at the URL, the complier version will be there. In most cases it should be: v0.4.25+commit.c4cbbb05.js , but you want to try updated ones if by any chance this doesn’t work.
- On Optimisation, choose No (We haven’t enabled it before).
- On ENTER THE SOLIDITY CONTRACT CODE BELOW, copy the whole code from Remix, and paste in that area. NOT THE BYTECODE, but the code itself. Can also be copied from your text editor.
Now, leave the other fields in blank and click on Verify and Publish.
But be aware… This is the moment that you were waiting for… It is about to happen!
FINGERS CROSSED. 🤞
The moment of truth…
If a success page come along with green check marks and stuff, you did it! You’ve made it, I’m proud of you, now you are a cypher punk, a part of the crypto movement!
If a red message comes along…try it again and see where you might have missed a step. I’m happy to help if you leave a comment below, but remember Google is your best friend 😉
To confirm that it works, go to https://ropsten.etherscan.io/ and look into your MEW Address, not the contract one, but your public address. If you can see your coins there, now you can relax and live the crypto dream in peace! At least until the next BTC rally 🙂
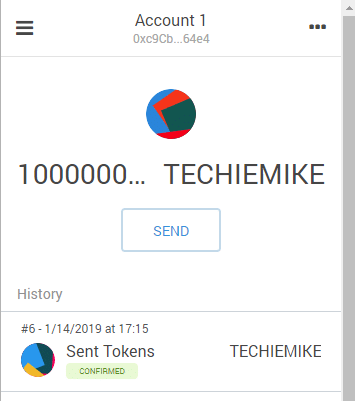
To be able to send these tokens, you need to access your MEW account by Viewing Wallet Info →Accessing and putting in your private Key →Unlocking Wallet →Select the option Load Tokens. After that, they will show up to be transferable.
Final Considerations:
You just made your own Cryptocurrency Token. This is the simplest way I have been able to put a token together. However, this is just the token creation process, it is not a crowd sale contract. I will upload another tutorial very shortly.
You’ve just unlocked some Blockchain superpowers, and I hope this helped you become more interested and involved with the amazing space. But remember that with great powers come great responsibilities. I truly hope you use your ideas for good and don’t be another scam.
NOW WHAT?
Now that you have your tokens, don’t forget to send me some, I would love to see what you have built. Send your brand-new token to
0xc9Cb3F482C7fbb4C51EA08eC0fe623e5E71f64e4
NOTICE : while the method outlined above will allow you to create an ERC20 token, please read the following articles for more details
https://github.com/halls7588/Code-for-the-6-Steps-to-ERC20-Tokens-and-ICO-Smart-Contracts-Tutorial
https://medium.com/coinmonks/6-steps-to-erc20-tokens-and-ico-smart-contracts-e90523afafa1
https://medium.com/@vittominacori/create-an-erc20-token-in-less-than-a-minute-2a8751c4d6f4
